Complete Recreational Go-Karts & Frames for sale
Table Of Content

Virtually all of our customers do some customization of their go karts along the way. We do however give you guidelines to where to buy the hardware for your new frame and what hardware to use. But please note… we Do NOT cover how to put a wheel on or how to bolt on the motor or how to install the tie-rods, as this will be very easy if you can build the frame! The parts only go on one way if you have the frame sitting there.
Build, Restore, Maintain
You know you’ve got to get as close as possible and dive into the inside, taking care not to smash into the side of anyone else. Listen to the revs and you’ll hear the Kart bog down. If you slug around too much tip 4 get past slower drivers as soon as possible. The apex is the point where you go from entering a corner to exiting and if you can hit that apex with good speed, you’ll also get a good exit, speed.
CONCEPT TRACK 3
They are adequate for racing and fun kart applications. There are also more powerful two-stroke engines available from manufacturers like Yamaha, KTM, Biland, or Aixro (Wankel engine) offering from 15 to 48 hp (11 to 36 kW). They run at up to 11,000 rpm, and are manufactured specifically for karting. PRD makes the PRD Fireball, a two-stroke engine delivering 28.5 hp (21 kW) at 15,580 rpm.
How To Get Slime Out Of Carpet: Effective Methods for Removing Slime – A Step-by-Step Guide
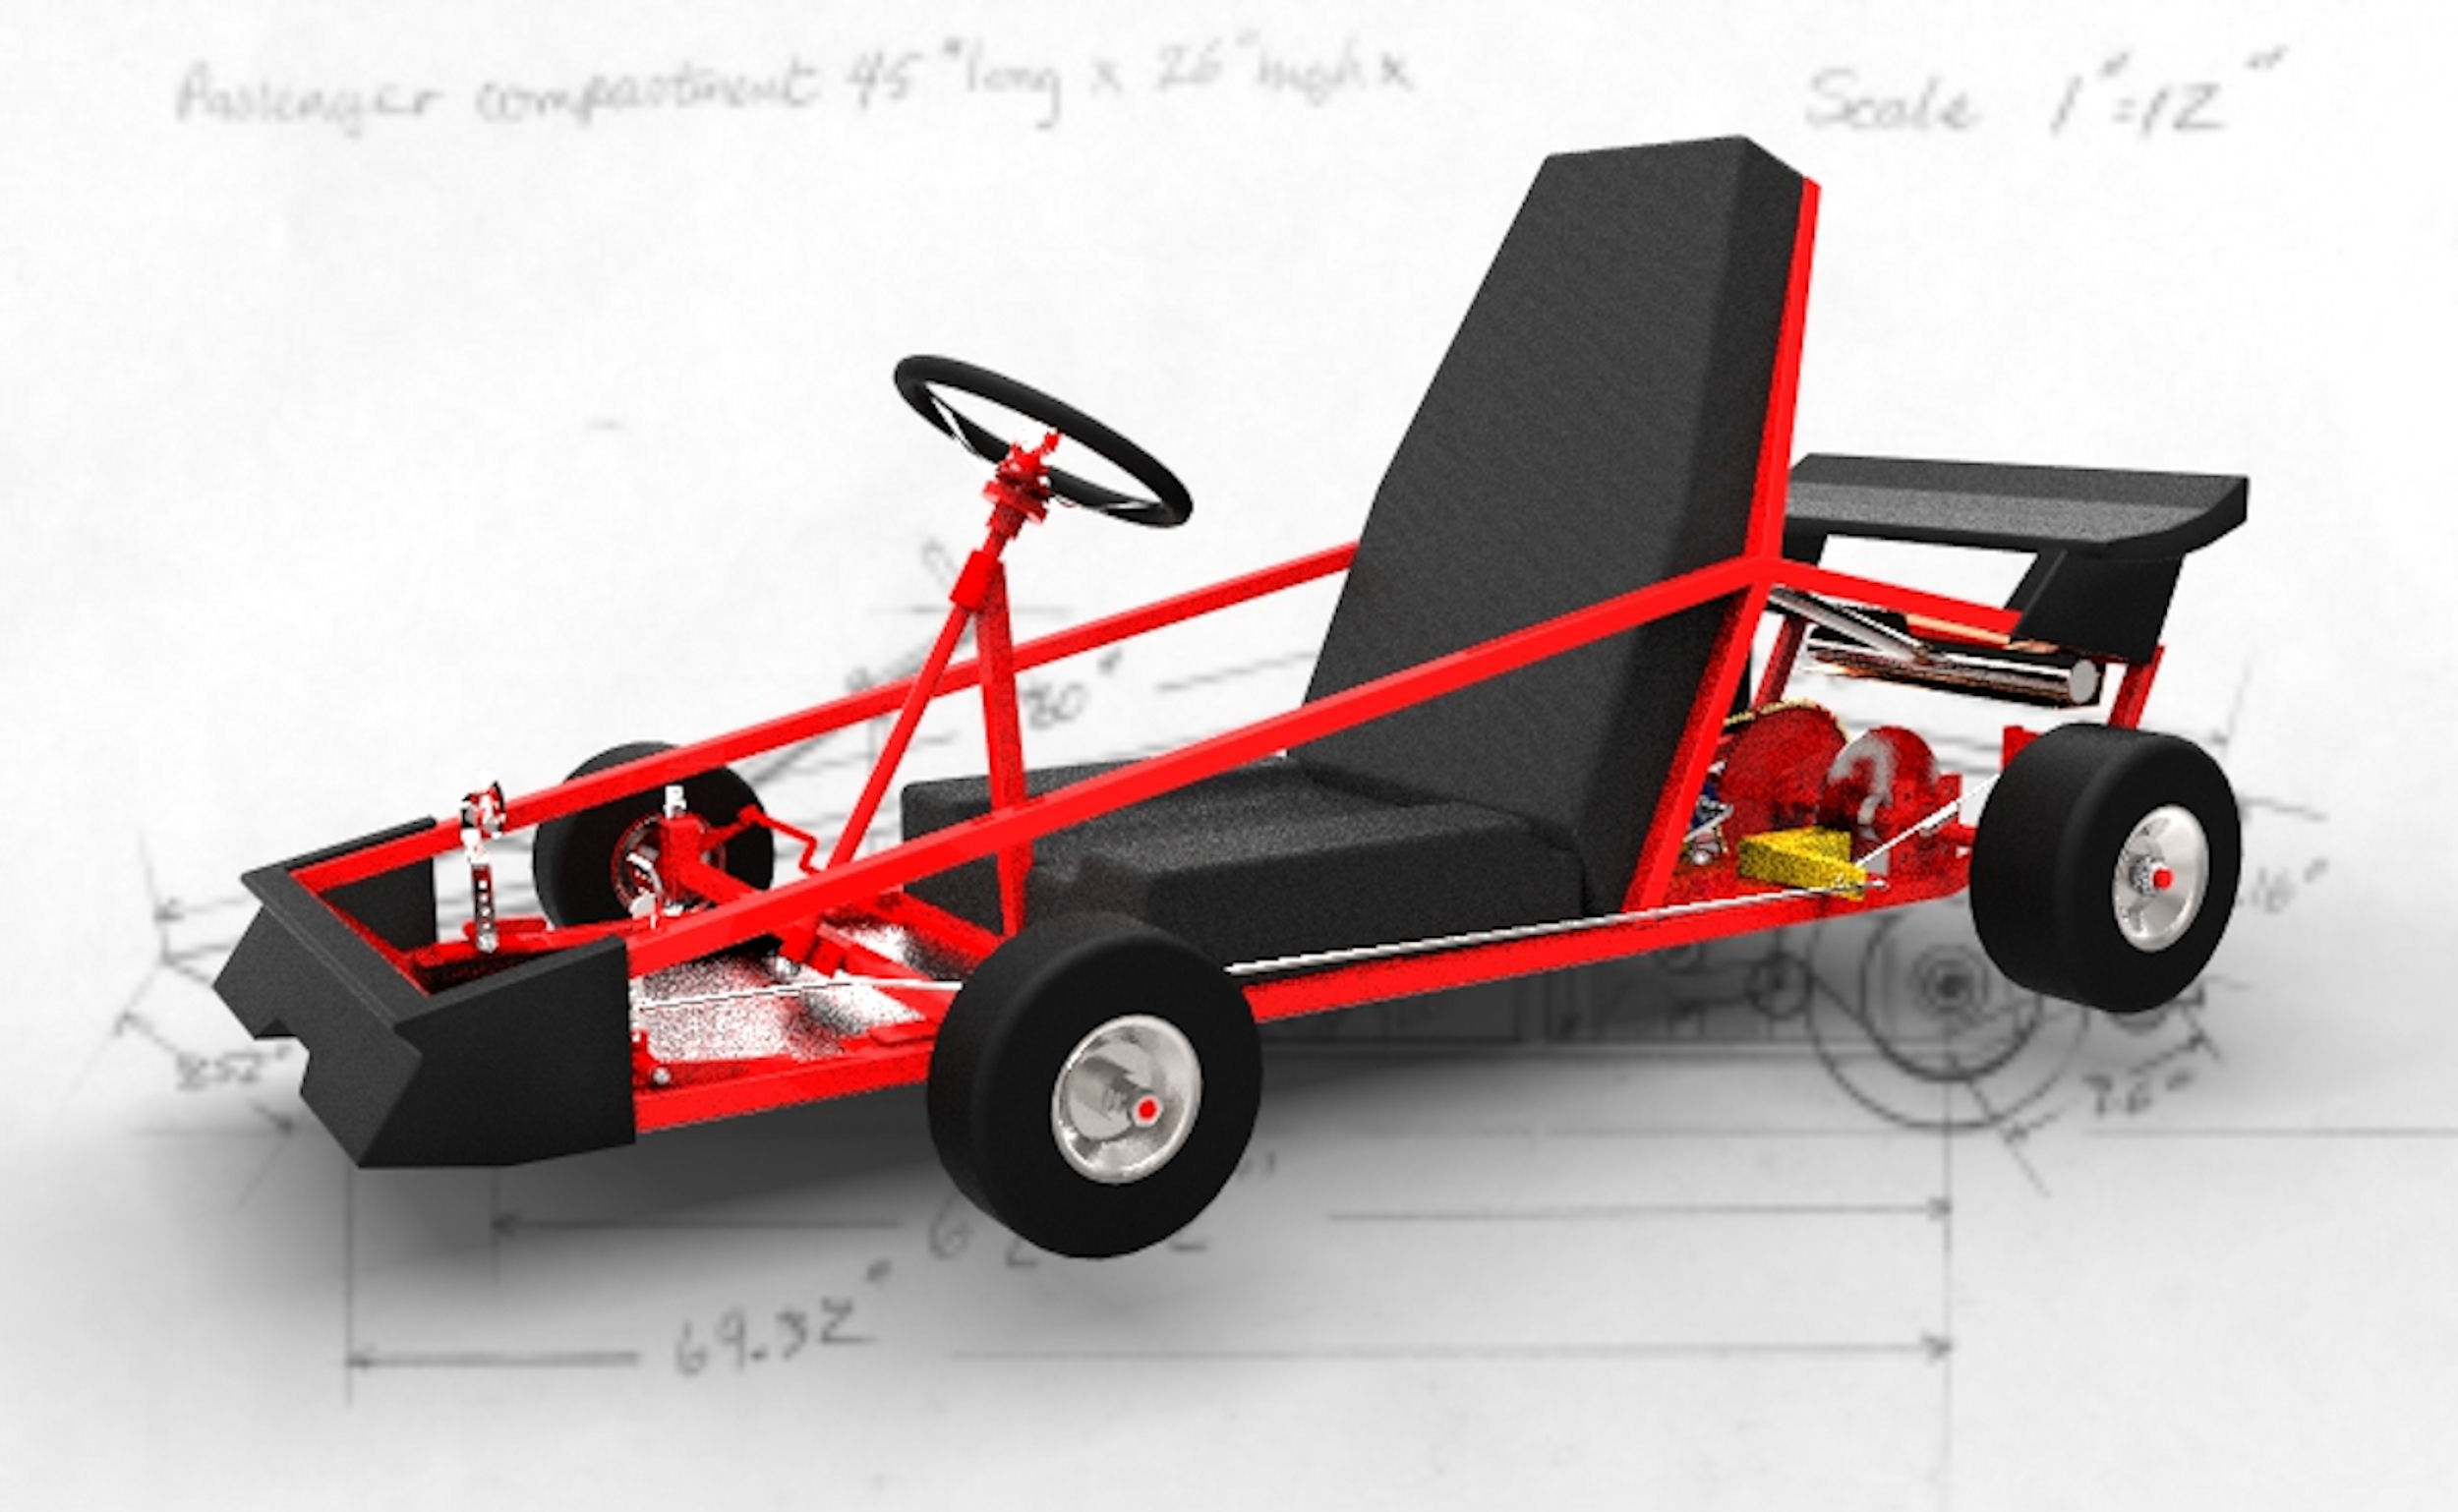
First off, we’ve got the mainframe, the heart of your go kart. It’s a meticulously crafted piece that’s designed to withstand the highs and lows of racing. It’s the main structure that holds everything together and takes the brunt of every twist, turn, and tumble on the track.
DIY Mini 120cc Go Kart at Home
The wheels didn’t fall off and there were not mechanical problems on the day. For a first run, we couldn't of asked for a better go. The kart reached up to 40 km/h so it went really well. The Jig for the frame is very important, it holds all your frame parts so they don't move and keeps every thing flat, straight and square. Fortunately a jig is not to difficult to make, You just need a sheet of plywood or MDF, some small blocks of wood and some screws. With over 1000+ crafts and projects, I Always Pick the Thimble makes exploring new crafting techniques easy.
Build Your Own Off Road Go Kart Chassis
The mount doesn't take long to make, and has to be strong enough to keep the brake caliper straight and take a far amount of abuse. It also needs to have a hole in the middle so the brake pad adjustment screw can be access. The steering column was rather easy to make, it was just a little bit difficult to get the measurements correct.
For this build, the first step is to cut all the pieces according to plan. It doesn’t hurt to purchase extra material in case of a wrong cut or you find you need additional steel. Use a paint marker to label each individual cut piece so they are easy to identify for assembly. Follow the rule of thumb to measure twice and cut once to save a lot of time in the long run.
Tony Fadell building electric go-karts - Business Insider
Tony Fadell building electric go-karts.
Posted: Fri, 27 May 2016 07:00:00 GMT [source]
This external control can also be used to limit young riders to a slow operating speed, while a race consisting only of adults is permitted a higher speed. These controls can be applied to both electric and combustion-engine karts. Traditionally, small two-stroke and four-stroke internal combustion engines are used in motorised go-kart racing.
BMS to host TN Solar Go-Kart Challenge - Elizabethton.com
BMS to host TN Solar Go-Kart Challenge.
Posted: Mon, 29 Apr 2019 07:00:00 GMT [source]
Go Kart Building 201 shows you how to layout your drive system, what ideal ratios you should be using and what clutch system best suites your cart. The lighter you are the more acceleration you’ll have, but the heavier you are, the more grip you’ll have. In this section, we’ll give you guys five tips to help you get that competitive racing edge and if you’re anything like me, you hate losing.
So you know if you’re good at driving, you can actually get around the outside of somebody, but you know my tip for now is get past them on the inside. If you can the more time you spend behind someone the more time you’ll lose on the leaders and the more chance someone else has to catch up and pass you so tip. So then, the next reason is that sitting close to the wheel puts more weight over the front wheels, and this will help you to turn into corners at a greater speed. You can make it with common DIY tools, and the necessary code is available for download.
After it’s tack welded and in place, use complete welds to finish. It’s easiest to start with the main base frame and build the go-kart up from there. For convenience, we pre-drilled all the holes our plans called for, especially in areas that would be harder to get to once welded together. Some of the holes needed were for the brake and gas pedals as well as the seats. Your plans should help you determine what pieces should be drilled. After you’re finished drilling, you’re ready to tack weld the pieces together.
To build this cool go-kart, first, you need a used gas powered go-kart one which you’ll transform into a solar one. What’s also great about this solar go-kart is that the builder has made a list of all necessary material and where you can find them. This cool homemade go-kart is the perfect choice for a DIY fan who doesn’t want to buy an expensive go-kart.
The pedals are a mirror image of each other, and have a piece of flat with holes for the brake and throttle cable. At this point, most of the frame should be complete. These arms were made in two matching sets, for a total of four arms. The lower arm will get a shock-mount bracket welded to it.
To keep the frame square, be sure to have a flat floor, or flat welding table to use. Double check the floor, however, is flat and does not have any dishes in it. You can do this by running a two-by-four across the floor and look to see if voids appear underneath the board. If they do, be sure to take note of the dips and avoid them when welding your frame. If you’re not on the racing line, you won’t be as quick and your grip will also suffer, which is something I’ll address in the next tip.
The frame is then put through an oven, and the urethane finish is baked onto the metal. This finish is mechanical as well, and can be chipped off. There are painting houses, or businesses that do powder coat painting. You would need to bring your frame over to the factory and have them ‘hang’ it on the line, and paint it. You may end up paying an arm and a leg, but the paint finish is very professional looking.
You can make your own stub axles, or buy them ready made. It is much easier to make them in four pieces as shown in the the photo and use the stub axle jig, the king pin and the wheel to hold the parts in place while welding. On our kart we drilled a hole in the end of the axle, tapped a 10mm thread and used a bolt to fasten the wheel on. The pedals are made out of 13mm steel pipe and were heated by a Oxy acetylene gas plant and bent into shape. We copied a racing kart pedal, so they have a bend in the upright to stop[ your foot from sliding off the side of the pedal.


Comments
Post a Comment